Have you ever wanted to make your special event stand out? Balloon backdrops are an easy way to do just that! They’re fun, eye-catching, and perfect for any celebration. Plus, creating a balloon backdrop yourself gives you the freedom to match it to your theme and save some money. Whether it’s a birthday, wedding, or baby shower, you can craft a design that feels unique and personal. The best part? You don’t need to be a pro to make something stunning!
Key Takeaways
Pick the right balloons for your backdrop. Use different sizes and colors to add depth and match your event's theme.
Get a balloon pump to save time and effort. An electric pump is best for big events, while a hand pump works for smaller ones.
Keep your backdrop steady with a strong stand or sticky hooks. Make sure it stays in place during the event.
Add decorations like plants or lights to make it prettier. These extras make your backdrop stand out and be remembered.
Think about where to place your backdrop. Put it where people will take pictures for the best effect.
Essential Materials for Balloon Backdrops
To make amazing balloon backdrops, you need the right supplies. Having everything ready makes the process easier and more fun. Let’s look at what you’ll need to get started.
Types and sizes of balloons
Balloons are the main part of your backdrop. Picking the right types and sizes is important. You can choose from latex or foil balloons. Latex balloons are cheap and flexible, while foil ones are shiny and metallic.
Using different sizes of balloons adds depth and style. Here’s a simple guide to help you:
Balloon Size |
Description |
Uses |
|---|---|---|
Small |
Under 10" |
Great for small parties or filling gaps |
Medium |
12" |
Perfect for birthdays or bigger events |
Large |
20"–36" |
Best for big events and bold designs |
Tip: Use colors that match your event theme. This makes your backdrop look neat and professional.
Balloon pump or inflator
Blowing up balloons by mouth is tiring, especially with many balloons. A balloon pump or inflator saves time and energy. It lets you focus on designing your backdrop.
Here’s a quick comparison of pumps:
Pump Type |
Time Per Balloon |
Cost |
|---|---|---|
Electric Balloon Pump |
$25–$50 |
|
Manual Balloon Pump |
10 pumps |
Under $15 |
Professional Electric Pump |
N/A |
$60+ |
Electric pumps are super fast and great for big events. Manual pumps are cheaper but take more effort. If you decorate often, a professional pump is worth it.
Tip: Use an electric pump for big events. Keep a manual pump as backup in case of power problems.
Balloon tape or garland strip
After inflating balloons, you’ll need to arrange them. Balloon tape or garland strips help you create beautiful designs.
Balloon tape is clear and has holes for balloon knots. Garland strips work the same way but are stronger, making them better for large displays.
Note: Use glue dots to fill gaps or secure loose balloons. This keeps your backdrop steady during the event.
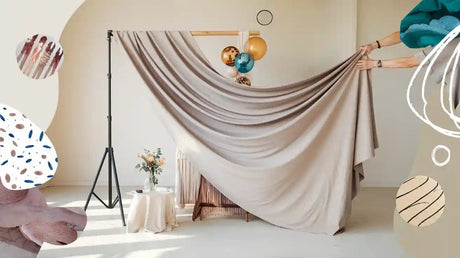
Backdrop stand or adhesive hooks
To keep your balloon backdrop upright, you need strong support. You can use a backdrop stand or adhesive hooks. Pick the one that fits your space and display size.
Backdrop Stand
A backdrop stand is great for a reusable and professional look. These stands can be adjusted to fit different backdrop sizes. You can buy them online or at party stores. Choose a stand that’s light but strong for easy setup and transport.
Pro Tip: For outdoor events, use sandbags or weights to stop the stand from falling over in the wind.
Adhesive Hooks
Adhesive hooks are perfect for small spaces or saving money. They stick to walls without damage and hold a lot of weight. Place hooks carefully to support balloon clusters or garland strips. Clean and dry the surface before sticking the hooks.
Note: Use removable adhesive hooks to avoid wall marks. Test one hook with a few balloons to check its strength.
Decorative accents like greenery or lights
Decorative accents make your balloon backdrop extra special. These small touches can turn a simple design into something amazing. Here are some ideas:
Greenery
Greenery adds a fresh and classy look to your backdrop. Use fake vines, eucalyptus leaves, or real flowers. Place greenery between balloons or hang it along the garland strip. This works well for weddings or garden-themed parties.
Tip: Match greenery to your balloon colors. For example, soft green leaves look great with pastel balloons.
Lights
String lights or fairy lights give your backdrop a magical glow. Wrap lights around the garland strip or weave them through balloons. Use LED lights for color-changing or twinkling effects. Lights are ideal for evening events to create a cozy feel.
Pro Tip: Battery-powered lights are easier to use than plug-in ones. They let you place your backdrop anywhere.
Mix greenery and lights for a stunning display. These accents make your balloon backdrops beautiful and unforgettable for guests.
Step-by-Step Guide to Building Balloon Backdrops
Select a theme and color palette
Before you start building your balloon backdrop, decide on a theme and color palette. This step sets the tone for your entire design. Think about the event you're decorating for. Is it a wedding, a birthday, or maybe a baby shower? Each occasion calls for a unique vibe. For instance:
Seasonal themes: Use pastel shades for spring or warm, earthy tones for fall.
Event-specific themes: Go for elegant whites and metallics for weddings or bright, playful colors for kids' birthdays.
Color and texture combinations: Monochromatic schemes create a sophisticated look, while bold, contrasting colors add a fun and lively touch.
When choosing colors, consider how they’ll look together. A good rule of thumb is to pick two or three main colors and add an accent shade for contrast. This keeps your design cohesive without feeling overwhelming.
Tip: If you’re unsure about colors, try matching them to the venue’s decor or the event’s invitations. This creates a seamless look that ties everything together.
Inflate balloons to varying sizes
Once you’ve settled on your theme, it’s time to inflate the balloons. Using balloons of different sizes adds depth and makes your backdrop visually interesting. Start by inflating small, medium, and large balloons. Aim for a mix, like this:
Small balloons: Perfect for filling gaps and adding detail.
Medium balloons: These will form the bulk of your design.
Large balloons: Use these as focal points to draw attention.
An electric balloon pump is your best friend here. It saves time and effort, especially if you’re inflating hundreds of balloons. If you don’t have one, a manual pump works too, but it’ll take longer.
Pro Tip: Don’t overinflate the balloons. Slightly underfilled balloons are less likely to pop and are easier to work with.
Create clusters and attach them to a garland strip
Now comes the fun part—assembling your balloon backdrop! Start by grouping your balloons into clusters. A cluster usually has three or four balloons of varying sizes. Tie them together at the knots using ribbon or string.
Once you’ve made several clusters, attach them to a garland strip or balloon tape. Here’s how:
Thread the balloon knots through the holes in the garland strip.
Alternate balloon sizes to create a balanced look.
Keep adding clusters until the strip is full.
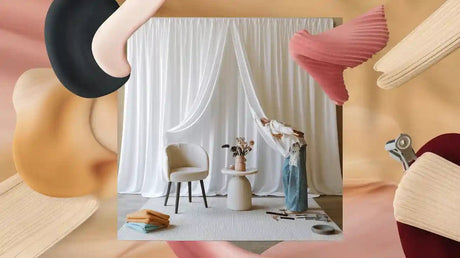
If you notice any gaps, fill them with extra balloons using glue dots or tape. This step ensures your backdrop looks full and polished.
Tip: Work on a flat surface or hang the garland strip on a garment rack while assembling. This makes it easier to see how your design is coming together.
By following these steps, you’ll have a stunning balloon backdrop that’s ready to wow your guests.
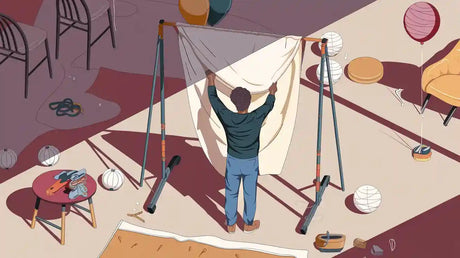
Secure the garland to a backdrop stand or wall
Once your balloon garland is ready, it’s time to secure it in place. This step ensures your creation stays upright and looks flawless throughout the event. You have two main options: a backdrop stand or a wall.
Using a Backdrop Stand
A backdrop stand is a sturdy and reusable option. It’s perfect if you want a professional look or plan to move the display. To attach the garland:
Position the stand where you want the backdrop.
Use zip ties or string to secure the garland to the stand. Tie the garland at multiple points to keep it stable.
Adjust the balloons to hide the stand’s frame.
Pro Tip: If you’re hosting an outdoor event, weigh down the stand with sandbags or heavy objects. This prevents it from tipping over in windy conditions.
Mounting on a Wall
If you’re short on space or prefer a simpler setup, mounting the garland on a wall works great. Adhesive hooks are your best friend here. Follow these steps:
Clean the wall surface to ensure the hooks stick properly.
Place the hooks where you want the garland to hang. Use a pencil to mark the spots beforehand.
Attach the garland by looping it through the hooks or tying it with string.
Note: Use removable adhesive hooks to avoid damaging the wall. Test one hook with a small section of the garland to check its strength.
Whether you use a stand or a wall, make sure the garland is secure. A well-anchored display keeps your balloon backdrops looking picture-perfect all day.
Add decorative elements for a polished look
Now that your garland is in place, it’s time to add the finishing touches. Decorative elements elevate your design and make it truly unforgettable. Here are some ideas to inspire you:
Ribbons and Tassels: Adding ribbons or tassels to your garland creates movement and texture. Choose colors that complement your balloons for a cohesive look.
Greenery: Fake vines or real leaves add a natural touch. Tuck them between balloons or drape them along the garland. This works especially well for weddings or garden parties.
Lights: String lights or fairy lights give your backdrop a magical glow. Wrap them around the garland or weave them through the balloons. Battery-powered lights are easy to use and don’t require an outlet.
Tip: Coordinate colors and textures for a polished finish. For example, metallic ribbons pair beautifully with shiny foil balloons.
Once decorated, think about where to showcase your masterpiece. Balloon garlands look stunning when mounted on walls, draped over entryways, or placed around dessert tables. Position your backdrop where it will grab attention and create the perfect photo opportunity.
With these decorative elements, your balloon backdrops will go from simple to spectacular. Guests won’t be able to resist snapping pictures in front of your stunning creation!
Tips for Enhancing Balloon Backdrops
Use different balloon sizes for a layered look
Want your balloon backdrop to stand out? Use balloons of different sizes. Small balloons fill spaces and add detail. Medium balloons make up most of the design. Large balloons grab attention and act as highlights.
Arrange balloons by mixing sizes for balance. Place big balloons near smaller ones for a layered effect. This makes your design look neat and professional.
Tip: Don’t blow up balloons too much. Slightly smaller balloons are easier to use and less likely to pop.
Add shiny or patterned balloons for style
Shiny and patterned balloons make your balloon backdrop more exciting. Metallic balloons look fancy and are great for weddings. Patterned balloons, like stripes or dots, are fun for birthdays or baby showers.
Use just a few metallic or patterned balloons with plain ones. For example, gold metallic balloons look great with white and pink ones. Polka-dot balloons add fun to colorful designs.
Pro Tip: Don’t use too many patterned balloons. They work best as small accents, not the main focus.
Include flowers or lights for extra flair
Flowers and lights make your balloon backdrop unforgettable. Flowers, real or fake, add beauty and freshness. Place them between balloons or attach them to the garland strip.
Lights, like fairy lights, create a magical glow. Wrap them around the garland or weave them through balloons. Battery-powered lights are easy to use anywhere.
Tip: Match decorations to your theme. Soft flowers go well with pastel balloons. Twinkling lights are perfect for evening events.
Follow these ideas to make a balloon backdrop that’s both stunning and memorable. Guests will love taking pictures in front of it!
Position the backdrop strategically for maximum impact
Where you place your balloon backdrop can make or break its impact. A well-positioned backdrop not only enhances the event’s decor but also creates the perfect spot for photos. Here’s how you can make sure your backdrop gets the attention it deserves.
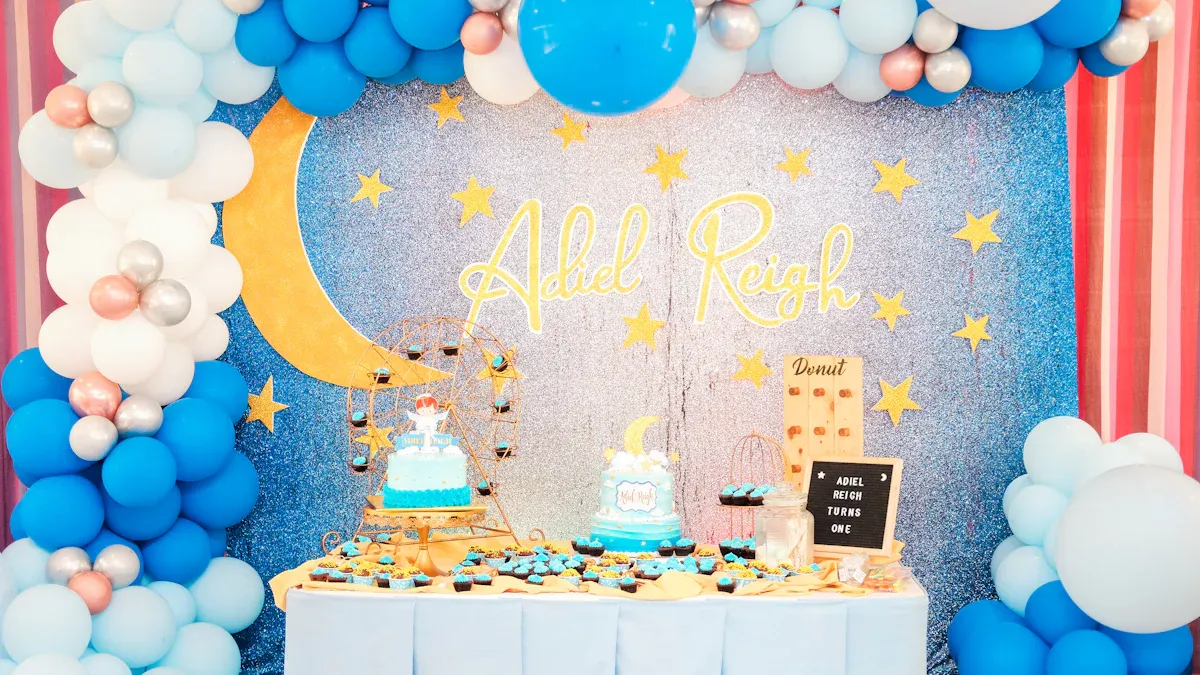
Choose a focal point: Place the backdrop where it naturally draws the eye. Popular spots include behind the dessert table, at the entrance, or as a centerpiece for the stage. Think about where guests will gather or take photos.
Consider lighting: Good lighting can make your backdrop pop. Position it near natural light during the day or add soft, warm lighting for evening events. Avoid placing it in dim corners where it might go unnoticed.
Mind the background: The area behind your backdrop matters too. A clean, uncluttered wall works best. If the backdrop is outdoors, make sure the surrounding area complements the design.
Tip: Test the placement by taking a few photos from different angles. This helps you see how it looks through the camera lens.
Adjust for the event type
Different events call for different placements:
Weddings: Position the backdrop behind the couple’s table or at the ceremony altar.
Birthdays: Place it near the cake table or gift area.
Baby showers: Use it as a photo booth backdrop for guests to pose with the mom-to-be.
By thinking about placement, you’ll ensure your balloon backdrop becomes the star of the event. Guests will love snapping pictures in front of it, and your hard work will shine in every photo! 🎈
Customizing Balloon Backdrops for Events
Birthday party ideas
Balloon backdrops make birthdays exciting and memorable. They’re bright, fun, and great for photos. Match them to the party theme or favorite colors. Try these simple ideas:
Make a rainbow scene with colorful balloons. Use white ones for clouds and arrange others in an arch for a rainbow effect.
Cover a whole wall with balloons for a photo booth or cake table backdrop.
Build a balloon arch using the party’s colors. Add ribbons or tassels for extra decoration.
These ideas are affordable and easy to create. They’ll wow your guests and make the birthday even more special.
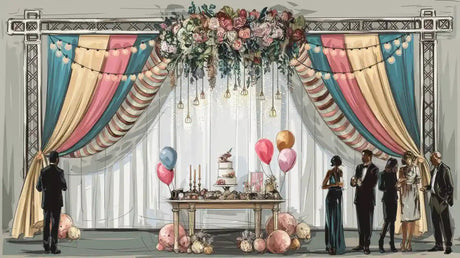
Wedding themes
Balloon backdrops bring elegance to weddings. They’re a modern way to decorate and fit any theme. Organic balloon designs are very popular. These use different sizes and colors for a natural look.
Soft colors like sage green, blush, and tan are trendy for weddings. They create a romantic feel. Add greenery or flowers to the balloons for extra beauty.
Air-filled balloons are another great choice. They last longer and work well outdoors. Use them for the ceremony or behind the couple’s table. A custom balloon backdrop will make the wedding unforgettable.
Baby shower designs
Baby showers celebrate new beginnings, and balloons set the mood perfectly. A balloon arch is a classic option. Use pastel colors to match the theme and attach the arch to a doorway or frame.
Add small flowers or ribbons between balloons for charm. You can also put LED lights inside some balloons for a glowing effect. This makes them look like tiny stars.
Balloon backdrops for baby showers are easy to make and look amazing. They’ll make the mom-to-be feel special and give guests a perfect photo spot.
Making balloon backdrops is simple and super fun! You can play with colors, shapes, and designs to fit your event. It feels great to see your creation become the party’s highlight. So, gather your balloons and start creating. Your guests will adore it, and you’ll feel proud of your amazing work!
FAQ
How long does it take to create a balloon backdrop?
It depends on the size and complexity of your design. For a simple garland, you’ll need about 1–2 hours. Larger, more detailed backdrops may take 3–4 hours. Prepping materials ahead of time can save you a lot of effort.
Tip: Work with a friend to speed up the process and make it more fun!
How many balloons do I need for a backdrop?
The number of balloons varies based on the size of your backdrop. For a standard 6-foot garland, you’ll need around 50–70 balloons. Larger designs may require 100 or more. Always buy extra balloons in case of pops or mistakes.
Pro Tip: Use a mix of sizes to create depth and reduce the total number needed.
Can I make a balloon backdrop the day before the event?
Yes, you can! Balloons inflated with air last longer than helium-filled ones. Assemble your backdrop a day early and store it in a cool, dry place. Avoid direct sunlight or sharp objects to keep it looking fresh.
Note: Latex balloons may shrink slightly overnight, so check them before the event.
What’s the best way to transport a balloon backdrop?
If possible, assemble the backdrop at the event location. For pre-assembled designs, carefully place them in a large vehicle. Use blankets or bubble wrap to protect the balloons during transport. Drive slowly to avoid sudden movements.
Tip: Inflate balloons on-site if you’re working with limited space or fragile designs.
Can I reuse balloons from a backdrop?
Unfortunately, most balloons can’t be reused once inflated. However, you can save decorative accents like greenery, lights, or garland strips for future projects. If you want a reusable option, consider foil balloons—they’re more durable and can be deflated and stored.
Eco-Friendly Tip: Dispose of balloons responsibly and recycle any non-latex materials.